Your cart is currently empty!
Tag: Safety Culture
-

Incident Reporting: Legal Essentials and Top Investigation Methods
Effective incident reporting methods are the backbone of a proactive safety management system. Not only do they help you comply with legal obligations, but they also enable you to learn from incidents, prevent reoccurrences, and foster a culture of continuous improvement. In this expanded guide, you’ll find:
- An Introduction to Incident Reporting
- Legal Requirements and Your Duties
- Detailed Walkthrough of the 5 Whys Analysis
- Step‑by‑Step Fishbone (Ishikawa) Diagram Method
- In‑Depth Guide to Fault Tree Analysis (FTA)
- Choosing the Right Method for Your Organisation
- Tips for Embedding Robust Reporting Processes
- Conclusion & Next Steps
- Focus Keyword, Tags, and Meta Description
Ready to streamline your incident reporting? Each methodology section ends with an invitation to request a free template or engage our full-service support. Let’s dive in.
1. Introduction to Incident Reporting
Incident reporting captures details of workplace events—ranging from near misses to serious injuries—and translates them into actionable insights. Without consistent reporting:
- Hazards remain hidden until they cause harm.
- Root causes go unidentified, leading to repeat occurrences.
- Legal non-compliance risks fines, enforcement notices, or prosecution.
By mastering proven incident reporting methods, you’ll empower teams to identify risks early, implement corrective measures, and demonstrate to stakeholders that safety is a top priority.
2. Legal Requirements and Your Duties
In the UK, specific regulations mandate when and how incidents must be reported:
RIDDOR 2013 (Reporting of Injuries, Diseases and Dangerous Occurrences Regulations)
- Reportable Incidents: Fatalities; specified injuries (e.g., fractures, amputations); over-seven-day injuries; occupational diseases; and dangerous occurrences (near misses with high potential).
- Timeframes: Fatalities and major injuries must be reported within 10 days; dangerous occurrences within 15 days; diseases and over-seven-day injuries can be reported online as soon as practicable.
- Duty Holders: Employers, people in control of premises, and self-employed individuals in certain industries.
Health and Safety at Work etc. Act 1974
- General Duty: Employers must ensure, so far as is reasonably practicable, the health, safety and welfare of employees.
- Record‑Keeping: Maintain records of incidents and investigations as evidence of due diligence.
Management of Health and Safety at Work Regulations 1999
- Risk Assessments: Requires employers to carry out “suitable and sufficient” assessments and take preventative or protective measures.
Failing to follow these requirements can result in heavy penalties, reputational damage, and, in severe cases, custodial sentences for directors. A documented incident reporting process not only ensures compliance but also underpins continuous safety improvements.
3. Detailed Walkthrough of the 5 Whys Analysis
The 5 Whys technique is a straightforward yet powerful root cause analysis tool. By repeatedly asking “why?”, teams dig beneath surface symptoms to reveal the underlying issue.
Why Choose 5 Whys?
- Simplicity: No special training or software required.
- Speed: Typically completed in a single meeting or toolbox talk.
- Focus: Encourages collaborative problem‑solving and ownership of solutions.
Step‑by‑Step Guide
- Gather the Team: Include individuals familiar with the incident, such as operators, supervisors and safety officers.
- Define the Problem: Write a clear, concise description of the incident at the top of your worksheet.
- Ask Why #1: Why did the incident happen? Record the answer verbatim.
- Continue Asking Why: Repeat until you reach a root cause—often before the fifth why.
- Validate the Cause: Verify through data, observations or testing that your identified cause is accurate.
- Develop Corrective Actions: Target solutions at eliminating or mitigating the root cause.
Example Scenario
- Incident: A warehouse worker trips over an electrical cable.
- Why 1? Because the cable was across the walkway.
- Why 2? Because there was no cable management system installed.
- Why 3? Because the standard operating procedure (SOP) didn’t mandate cable clips.
- Why 4? Because the incident report template lacked a section for housekeeping controls.
- Why 5? Because the original template was designed without input from maintenance staff.
Outcome & Action: Update your incident reporting and assessment templates to include housekeeping checks and cable management before tasks begin.
Need a free 5 Whys template or full-service support? Contact us.
4. Step‑by‑Step Fishbone (Ishikawa) Diagram Method
The Fishbone Diagram (or Ishikawa) offers a visual framework to explore all potential causes of an incident.
Benefits of Fishbone Diagrams
- Holistic View: Categorises causes for comprehensive analysis.
- Team Collaboration: Encourages brainstorming from multiple perspectives.
- Clarity: Makes complex interactions easy to visualise.
Creating Your Fishbone Diagram
- Draw the Backbone and Head: At the right end, write the incident description.
- Select Major Categories: Typical headings include People, Process, Equipment, Materials, Environment, and Management.
- Brainstorm Sub‑Causes: Under each category, list factors that may have contributed.
- Review & Validate: Vote or use data to prioritise the most likely causes.
- Action Planning: Assign mitigation measures for each high‑priority cause.
Example Breakdown
- People: Inadequate training on new equipment.
- Process: No checklist for shift handovers.
- Equipment: Outdated guard on conveyor belt.
- Materials: Packaging debris accumulating near machinery.
- Environment: Poor lighting in the loading bay.
- Management: No regular housekeeping audits scheduled.
Armed with this diagram, your team can tackle each root category systematically.
Looking for a free Fishbone Diagram template or expert facilitation? Contact us.
5. In‑Depth Guide to Fault Tree Analysis (FTA)
Fault Tree Analysis is a rigorous, logic-based method ideal for complex systems where multiple failures can converge.
Why Use FTA?
- Precision: Models how combinations of faults lead to an incident.
- Quantification: Enables probability estimation when data is available.
- Complex Systems: Suited for manufacturing lines, process plants, and safety-critical operations.
Building Your Fault Tree
- Define the Top Event: Place the incident outcome (e.g., system shutdown) at the top.
- Identify Immediate Causes: Link them with OR gates if any cause alone triggers the event, or AND gates if multiple must occur together.
- Decompose Further: Break each cause down into more granular sub-events.
- Assign Probabilities (Optional): For each basic event, use historical data or expert judgment.
- Analyze and Mitigate: Locate minimal cut sets—combinations of failures that cause the top event—and implement controls.
Simplified Example
- Top Event: Conveyor belt malfunction causing downtime.
- Branch 1 (Motor Overload): Motor overheating OR voltage spike.
- Branch 2 (Belt Misalignment): Worn rollers AND lack of maintenance.
- Branch 3 (Control Failure): Faulty sensor OR software glitch.
By targeting the minimal cut sets—such as implementing thermal overload protection and a predictive maintenance schedule—you can prevent the top event.
Want a free Fault Tree Analysis template or full-service FTA facilitation? Contact us.
6. Choosing the Right Method for Your Organisation
No single method fits all contexts. Consider:
- Complexity: Use FTA for multi-component systems; opt for 5 Whys on straightforward events.
- Team Size & Expertise: Fishbone works well in group workshops; 5 Whys can be done quickly by small teams.
- Data Availability: If you have rich historical data, FTA’s probabilistic approach adds value.
Often, combining methods—starting with 5 Whys, expanding with a Fishbone, then validating critical paths in FTA—yields the most robust insights.
7. Tips for Embedding Robust Reporting Processes
- Simplify Your Forms: Ensure required fields are clear and intuitive.
- Train Regularly: Conduct annual workshops and toolbox talks on reporting procedures.
- Leverage Technology: Adopt mobile apps for real-time submissions and analytics.
- Close the Loop: Share outcomes of investigations with all staff to reinforce trust.
- Set Clear SLAs: Define timelines for initial report review, investigation completion and action closure.
Embedding these practices ensures your incident reporting remains effective, compliant and continuously improving.
8. Conclusion & Next Steps
Mastering incident reporting methods equips your organisation to meet legal requirements under RIDDOR, HSW Act and Management Regulations while harnessing incidents as opportunities for improvement. Whether you choose 5 Whys, Fishbone Diagrams or Fault Tree Analysis, the key is consistent application and follow‑through on corrective actions.
Ready to elevate your incident reporting?
- Free Templates: Request an editable 5 Whys, Fishbone and FTA template tailored to your needs.
- Full-Service Support: Engage our expert consultants to facilitate workshops, customise forms and integrate digital solutions.
Visit our Contact Us page now to get started—no cost, no obligation.
-
Free H&S Risk Assessment Template: How to Use It for Workplace Safety
Ensuring a safe working environment isn’t just about ticking boxes—it’s about protecting your team, your reputation, and your bottom line. A well-structured H&S risk assessment template is the cornerstone of any proactive health and safety (H&S) programme. In this comprehensive guide, you’ll discover:
- Why a Risk Assessment Matters
- Key Legislative Requirements & Standards
- Anatomy of an H&S Risk Assessment Template
- Step-by-Step Instructions for Completion
- Using a Risk Matrix to Prioritise Hazards
- Implementing and Monitoring Control Measures
- Case Study: Real-World Application
- Common Pitfalls and How to Avoid Them
- Digital Tools & Automation for Streamlined Assessments
- Embedding Safety Culture Across Your Organisation
- Measuring Success & Continuous Improvement
- Next Steps & How to Request Your Free Template
And if you’d like an editable, bespoke template you can adapt to your specific operations, simply contact us to request your free H&S risk assessment template today!
1. Why a Risk Assessment Matters
A risk assessment template is more than compliance paperwork—it’s your roadmap to:
- Protecting People: By identifying hazards such as slips, trips, machinery entanglement or chemical exposure, you can act before injuries occur.
- Reducing Costs: Preventing accidents saves on lost production, insurance premiums and legal fees.
- Ensuring Compliance: UK law mandates employers assess and control risks; a documented assessment demonstrates due diligence.
- Driving Continuous Improvement: Regular reviews encourage refinement of procedures, training and resource allocation.
2. Key Legislative Requirements & Standards
A robust H&S programme aligns with these critical frameworks:
- Health and Safety at Work etc. Act 1974: Primary UK legislation placing a duty on employers to safeguard employees’ health and safety.
- Management of Health and Safety at Work Regulations 1999: Requires suitable and sufficient risk assessments covering hazard identification, risk evaluation and control implementation.
- ISO 45001:2018: Global standard for Occupational Health & Safety Management Systems, promoting legal compliance and performance improvement.
- COSHH Regulations 2002: Governs the management of hazardous substances, including specific risk assessments for chemical exposure.
3. Anatomy of an H&S Risk Assessment Template
Every effective template guides you through these essential sections:
- Activity Description: Define the scope, for example “Forklift loading operation in warehouse Bay 3.”
- Hazard Identification: List specific hazards, such as unguarded moving parts or manual handling risks.
- Who Might Be Harmed: Identify affected groups—operators, maintenance staff, visitors.
- Risk Evaluation: Rate likelihood and severity on a simple 1–5 scale.
- Risk Score: Multiply likelihood by severity to prioritise hazards.
- Control Measures: Document existing controls (Guards, PPE, training) and propose additional measures.
- Priority & Action Owner: Assign each action a priority level, responsible person and deadline.
- Review Date: Schedule the next reassessment—at least annually or after any significant change.
- Notes & Comments: Capture observations, worker suggestions or follow-up items.
4. Step-by-Step Instructions for Completion
- Select and Describe the Activity
- Focus on highest-risk tasks such as machinery operation or chemical handling.
- Provide enough detail so reviewers understand the exact process.
- Walk the Process and Engage Staff
- Conduct a physical walkthrough.
- Interview front-line staff to uncover hidden hazards.
- Identify Hazards Precisely
- Replace generic terms with specifics (e.g., “unguarded rotating shafts on Press A”).
- Consider environmental factors like noise or temperature extremes.
- Evaluate Risk
- Assign a likelihood score (1 = Rare to 5 = Almost Certain).
- Assign a severity score (1 = Minor injury to 5 = Fatality).
- Calculate the Risk Score
- Multiply likelihood by severity to get a numerical score.
- Use colour codes or tiers (e.g., 1–6 = Low, 7–12 = Medium, 13–25 = High).
- Document Controls
- List existing measures first (e.g., guards, PPE).
- Propose new controls: engineering fixes, administrative updates, or training.
- Assign Actions and Deadlines
- Set realistic timeframes and responsibility, such as:
- Action: Install pressure-sensitive mat on press base
- Owner: Jamie Lee
- Deadline: 15 Aug 2025
- Set realistic timeframes and responsibility, such as:
- Review and Close Out
- Confirm actions are completed, update the template and reset the review cycle.
- Record evidence of completion, like photos or emails.
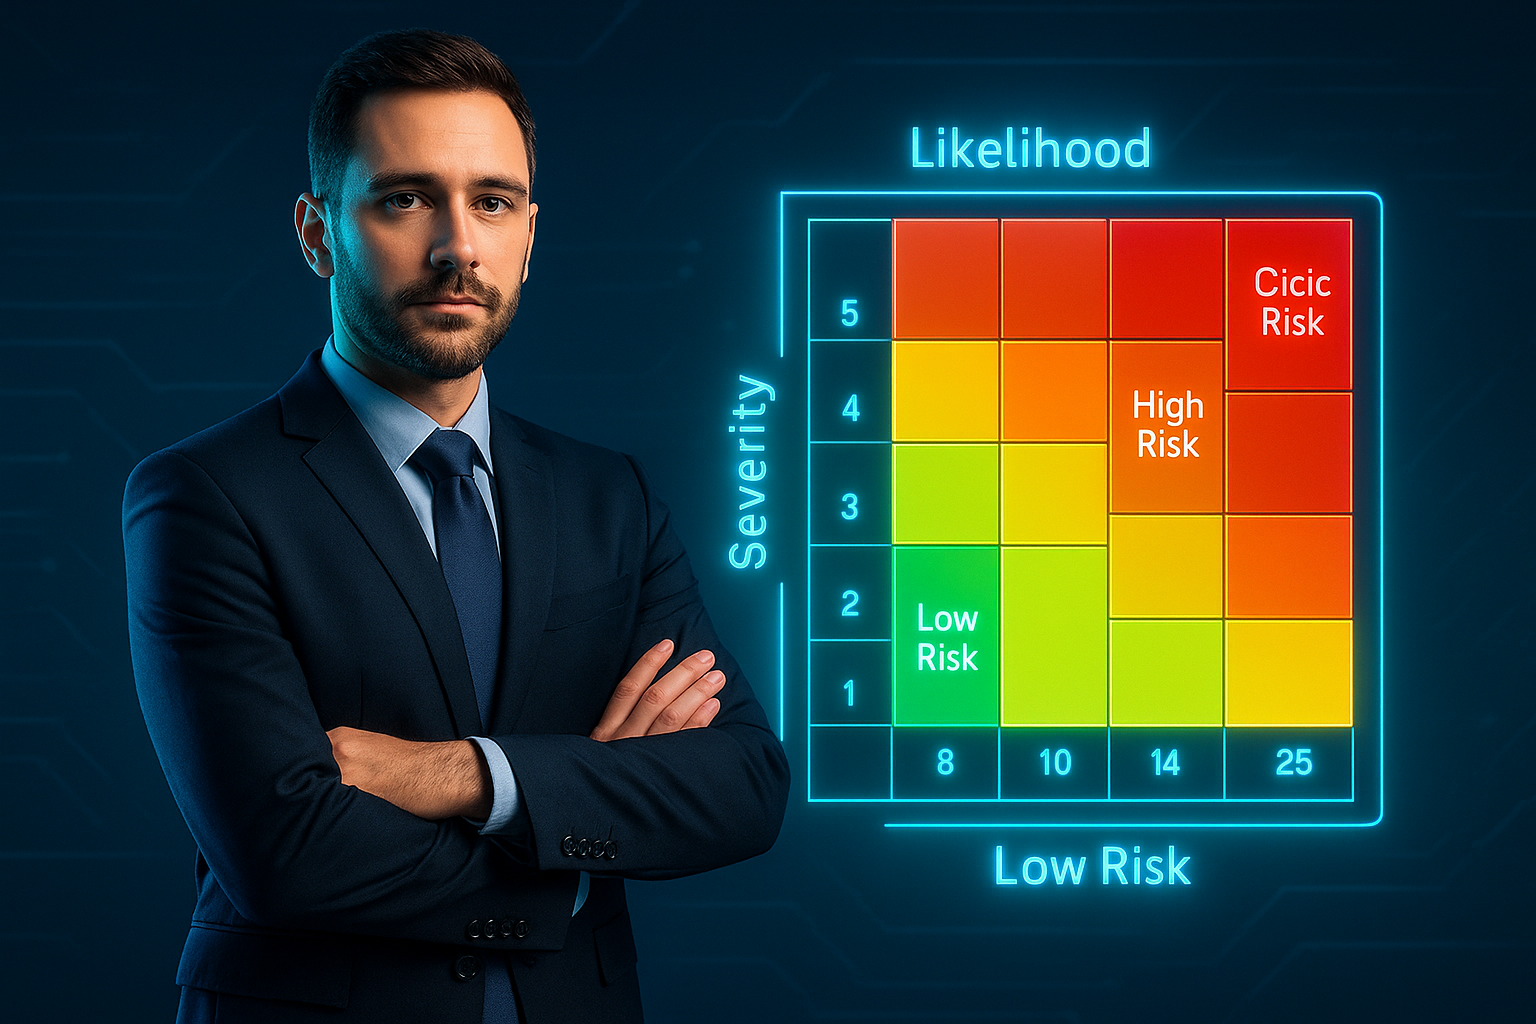
5. Using a Risk Matrix to Prioritise Hazards
A visual risk matrix enables quick identification of high-risk areas. For example, a simple 5×5 grid where:
- The vertical axis represents Likelihood (1–5)
- The horizontal axis represents Severity (1–5)
- Each cell is colour-coded: Green for Low, Amber for Medium, Red for High
Embed this matrix in your template or digital tool to auto-highlight critical items.
6. Implementing and Monitoring Control Measures
- Engineering Controls: Machine guards, interlocks, ventilation systems.
- Administrative Controls: Updated procedures, safety signage, shift rotations.
- Personal Protective Equipment (PPE): Last line of defence—ensure fit, selection and training.
- Monitoring: Schedule monthly inspections, maintain a near-miss reporting system and hold regular review meetings with action owners.
Document all findings and follow up until each control is verified as effective.
7. Case Study: Real-World Application
Scenario: A manufacturing company faced frequent near misses at a stamping press.
Steps Taken:
- Identified unguarded moving parts and poor housekeeping.
- Rated risk as High (Likelihood 4 × Severity 4 = 16).
- Proposed controls: install fixed guards, implement floor-marking zones and weekly housekeeping checks.
- Assigned actions with deadlines and owners.
Outcome: Zero near misses over three months, an 8% reduction in insurance premiums and positive audit feedback from HSE inspectors.
8. Common Pitfalls and How to Avoid Them
- Vague Hazard Entries: Always use precise descriptions (e.g., “oil spill near Packing Bay 2”).
- Skipping Worker Engagement: Conduct short workshops or toolbox talks before completing the form.
- One-Time Assessments: Schedule reassessments at least annually and after any incident.
- Over-Engineering Controls: Balance cost versus benefit—sometimes signage or training suffices.
- Lack of Follow-Up: Use digital reminders or calendar alerts to track and close out actions.
9. Digital Tools & Automation for Streamlined Assessments
- Mobile Inspection Apps: Capture data, photos and trigger reminders on the go.
- Cloud-Hosted Risk Registers: Centralise assessments, track trends and generate dashboards.
- Automated Reminders: Emails triggered when review dates or deadlines approach.
- Analytics & Reporting: Quickly identify top hazards, overdue actions and training gaps.
Ask us about integrating these tools when you contact us.
10. Embedding Safety Culture Across Your Organisation
- Leadership Involvement: Have senior management review high-risk items quarterly.
- Continuous Communication: Share lessons learned in newsletters and meetings.
- Recognition Programs: Reward teams for proactive hazard reporting and action-closure rates.
- Training & Development: Refresh assessors on best practices and emerging risks, such as ergonomic hazards or remote-work stress.
11. Measuring Success & Continuous Improvement
Track these key performance indicators (KPIs):
- Number of assessments completed
- Actions closed versus overdue
- Incident and near-miss trends
- Audit findings and compliance scores
- Employee safety perception survey results
Review these metrics quarterly to ensure your H&S programme evolves effectively.
12. Next Steps & How to Request Your Free Template
A tailored, editable H&S risk assessment template simplifies the start of your safety programme. To request yours:
- Visit our Contact Us page.
- Tell us about your organisation and primary activities.
- Receive your bespoke, fully editable template within one business day—no cost, no obligation.
Start your journey to a safer workplace today. Complete your first assessment, close out actions, and watch your incident rates—and costs—fall.